How to assign tickets and close them? Once the issue mentioned in the ticket is resolved, inform the student by call/email/text message.
Tickets are used by students to inform the technical support team of the issue they are facing with the online curriculum and work
- Login to your Trubicars account.
-
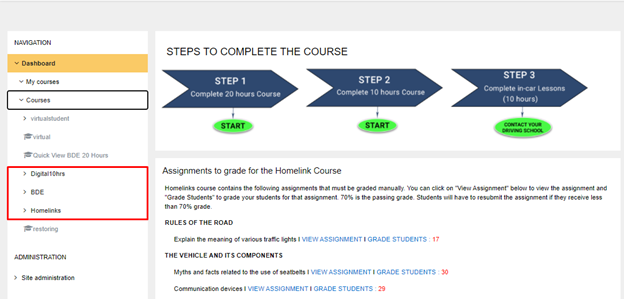
On the Dashboard, select Dashboard > Courses > and click on the course in which the student has raised a ticket, as shown in the screenshot below:
-
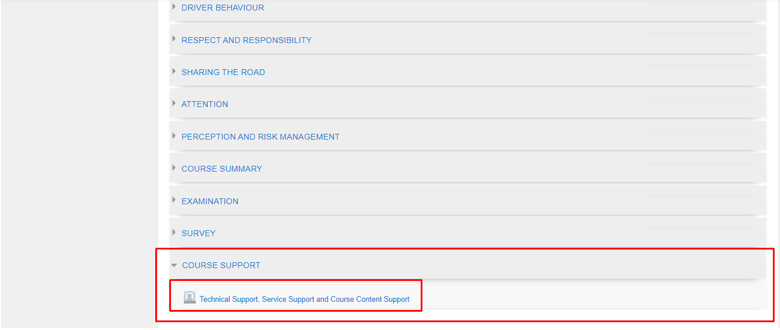
On the course page, click on “Technical Support, Service Support and Course Content Support” option under ‘COURSE SUPPORT’ module:
-
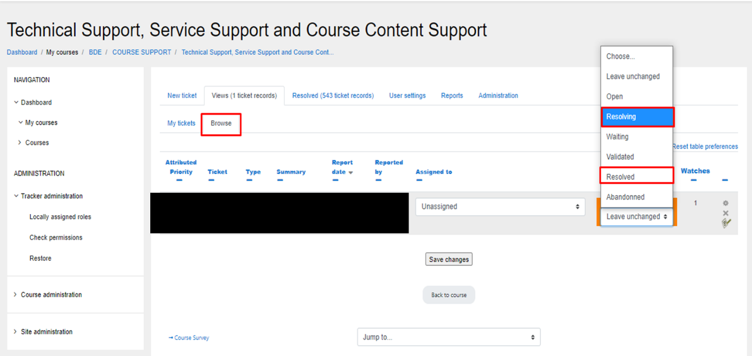
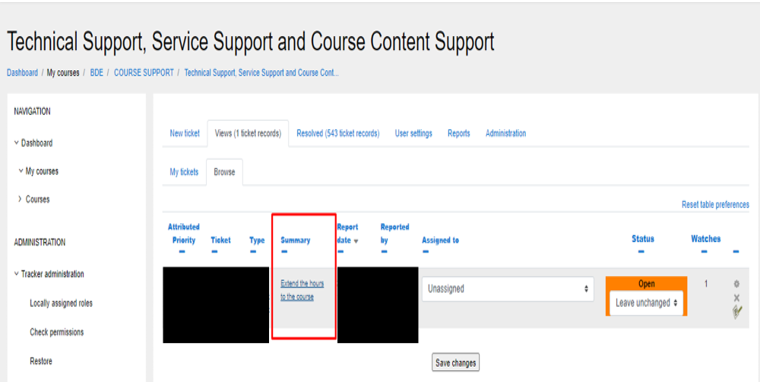
On the “Technical Support, Service Support and Course Content Support” page, click on “Browse” button to find open tickets.
Under the status of the ticket, using the drop-down menu, change status to “Resolving” while you are working on the ticket and change status to “Resolved” when you have resolved the issue mentioned in the ticket:
-
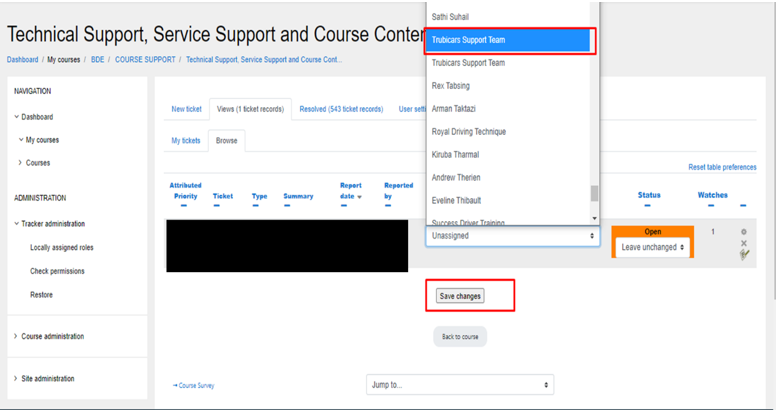
Under Assigned to column, assign the ticket to the person responsible for resolving the ticket. For technical issues, assign ticket to “Trubicars Support Team”.
Click on Save Changes button to save the changes made to status of the ticket.
-
Under summary, click on the title of the ticket to open ticket and add your comments on the ticket:
-
On the ticket page, you can find the description of the issue mentioned by the student under “Description” section.
Click on “Turn Editing On” to add your comments to the ticket